
The dough’s already sticky, and I can’t stop sneaking bites. Red Velvet Crinkle Cookies are about to make my kitchen smell like a bakery, and I’m here for it.
These treats are perfect for nights when you’ve got a craving but zero time to spare (trust me, I get it). Unlike the usual cookie recipes that require chilling or complicated steps, this one’s all about mixing and baking. You’ll whip these up in no time. Seriously, your new go-to is here!
Why You’ll Love This Red Velvet Crinkle Cookies
- Easy Prep: Mixing the dough is a breeze, and you won’t need any fancy equipment to whip it up.
- Rich Flavor: The cocoa and vanilla create a delightful balance that’s not too sweet, just right for a treat.
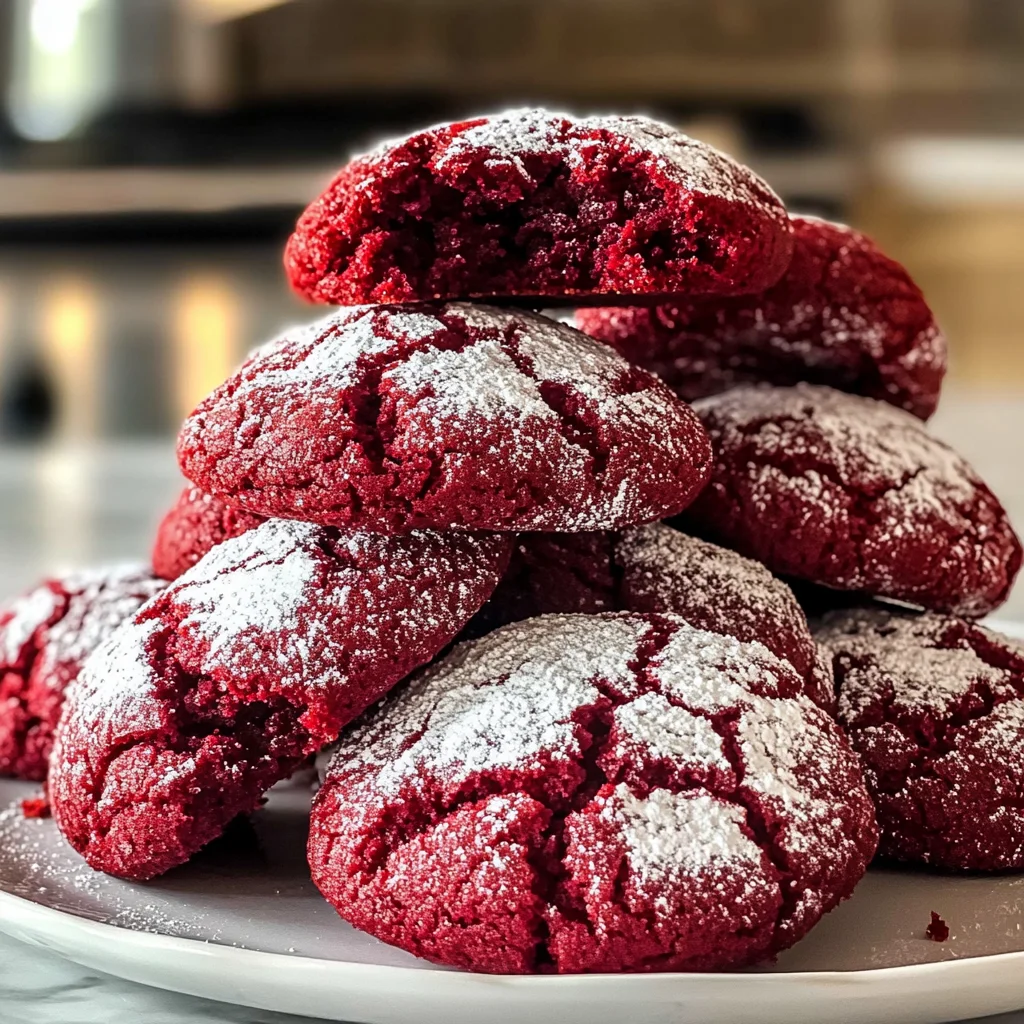
- Sticky-Sweet Texture: They’ve got this melt-in-your-mouth softness with a slight crunch from the powdered sugar coating—so good!
- Versatile Treat: Great for holidays or just because; they fit in perfectly at any get-together (trust me on this).
- Quick Bake Time: Ready in about 12 minutes, but keep an eye on them—they can go from soft to overdone fast!
Red Velvet Crinkle Cookies Ingredients
For the Base:
all-purpose flour (2 cups) — Sift the flour or your cookies’ll be dense and dry.
unsweetened cocoa powder (1 tablespoon) — Use Dutch-process cocoa for a rich flavor, don’t skimp on quality—like Hershey’s.
baking powder (1 teaspoon) — Don’t skip baking powder; it’s crucial for that crinkle effect, or you’ll get flat cookies.
baking soda (1/2 teaspoon) — Always use fresh baking soda; expired stuff won’t give you any rise.
salt (1/2 teaspoon) — Don’t forget the salt—it balances sweetness; without it, your cookies’ll taste bland.
granulated sugar (1 cup) — Granulated sugar’s a must; brown sugar’s way too moist for this recipe.
vegetable oil (1/2 cup) — Go for canola oil if you can’t find vegetable oil; don’t use olive oil here.
eggs (2 large) — Use large eggs for consistent texture; if you use medium, cookies might be too dry.
vanilla extract (1 teaspoon) — Don’t skimp on pure vanilla extract; imitation’s a letdown and ruins the flavor.
red food coloring (1 tablespoon) — Gel food coloring’s best for vibrant color; liquid can mess with dough consistency.
For the Topping:
powdered sugar (1 cup) — Dust with powdered sugar right before serving; otherwise, it’ll melt into the cookies.
Full measurements in the recipe card below.
How to Make Red Velvet Crinkle Cookies
1. Preheat Oven: Preheat your oven to 350°F (175°C) and line a baking sheet with parchment paper. This helps the cookies bake evenly and prevents sticking.
2. Mix Dry Ingredients: In a medium bowl, whisk together the flour, cocoa powder, baking powder, baking soda, and salt until combined. Set this aside while you work on the wet ingredients.
3. Combine Wet Ingredients: In a large bowl, mix the granulated sugar and vegetable oil until smooth. Then, add the eggs, vanilla extract, and red food coloring. Mix until everything’s well combined—no streaks left!
4. Add Dry to Wet: Gradually fold the dry ingredients into the wet mixture, mixing just until combined. Don’t overmix! The dough’ll be sticky, which is what you want for those delicious Red Velvet Crinkle Cookies.
5. Scoop and Shape Dough: Using a cookie scoop or tablespoon, scoop out dough and roll it into balls (about 1 inch in diameter). And now comes the fun part—roll each ball in powdered sugar until fully coated!
6. Bake Cookies: Place the powdered sugar-coated dough balls on the prepared baking sheet, spacing them about 2 inches apart. Bake for 10-12 minutes; you’ll know they’re done when the edges are set but the centers still look soft.
7. Cool Down: Remove from the oven and let them cool on the baking sheet for about 5 minutes before transferring to a wire rack to cool completely. Watch out—if you rush this step, they might fall apart when you try to move them!
Exact quantities in the recipe card below.
How to Store Red Velvet Crinkle Cookies
- Room Temperature: Keep them in an airtight container for up to 3 days. (They’ll stay soft and chewy, but don’t expect them to last long if you’ve got a crowd around.)
- Refrigerator: Store in a sealed container for about a week. (Just know that the cookies might lose some of their soft texture — they get a bit firmer.)
- Freezer: Freeze in a single layer on a baking sheet first, then transfer to a freezer-safe bag for up to 3 months. (They thaw really well, but the powdered sugar coating can absorb some moisture.)
- Reheating: Pop them in the microwave for about 10-15 seconds. (You’ll want them warm and melty-gooey in the center; just keep an eye out so they don’t overheat.)
What to Serve with Red Velvet Crinkle Cookies?
These cookies are sweet and rich, so adding something tart or creamy can balance out that sweetness perfectly. Here are some great pairings:
- Vanilla Ice Cream: A scoop of vanilla ice cream adds a cold, creamy texture that softens the cookie’s richness.
- Fresh Berries: Try raspberries or strawberries for a pop of color and tartness that cuts through the sweetness.
- Cream Cheese Frosting: Spread a thin layer on top for added creaminess—just whip it up while cookies cool (5 minutes!).
- Espresso or Coffee: The bitterness provides a nice contrast to the sugar; brew a fresh cup while baking (about 5-10 minutes).
- Citrus Sorbet: A citrusy flavor brings brightness; serve it alongside for a refreshing bite against the cookie’s softness.
- Milkshake: Blend your favorite flavor (chocolate or vanilla) for an indulgent treat—richness meets richness, but it’s so fun!
- Peanut Butter Dip: Whip together peanut butter and Greek yogurt for a creamy dip that adds protein and balances texture beautifully.
Red Velvet Crinkle Cookies Variations
Here’s how to play with this recipe and make these Red Velvet Crinkle Cookies your own.
- Minty Fresh: Add 1 teaspoon peppermint extract along with the vanilla extract for a refreshing twist.
- Cream Cheese Filling: Make a small indentation in the dough balls before baking and fill with cream cheese (about 1 teaspoon).
- Choco-Mint Swirl: Mix in 1/2 cup of chocolate chips for an extra chocolatey bite.
- Nutty Flavor: Fold in 1/2 cup finely chopped walnuts or pecans after mixing in the wet ingredients.
- Spicy Kick: Add 1/4 teaspoon cayenne pepper with the dry ingredients for a surprising heat.
- Citrus Zing: Stir in the zest of one orange or lemon with the sugar and oil for brightness.
- Next Level Upgrade: Dip cooled cookies halfway in melted white chocolate and sprinkle with crushed nuts for added crunch.
Make Ahead Options for Red Velvet Crinkle Cookies
I like to prep the dough for my Red Velvet Crinkle Cookies ahead of time. You can make it up to 2 days in advance, just store it in an airtight container in the fridge. When you’re ready to bake, scoop and roll the balls in powdered sugar right before baking. Honestly, the cookies don’t hold their texture as well once baked, so I recommend making them fresh for the best chewy centers. If you’ve got leftover cookies, though, they’ll keep at room temp in a sealed container for about 3 days. Just remember: fresh is always better! Bake ’em up when you’re ready.
Red Velvet Crinkle Cookies Recipe FAQs
Can I make Red Velvet Crinkle Cookies ahead of time?
Absolutely! You can prepare the dough and chill it in the fridge for up to 3 days. Just make sure to wrap it tightly in plastic wrap. When you’re ready to bake, scoop and roll them in powdered sugar right before popping them in the oven. (Trust me, this keeps them fresh and delicious.) Just remember, they’ll take a bit longer to bake if the dough’s cold!
What can I use instead of vegetable oil in this recipe?
If you can’t find vegetable oil, canola oil works great as a substitute. Both keep these cookies moist without affecting flavor. DO NOT use olive oil here; it’ll change the taste and texture way too much. And if you’re out of both, melted coconut oil could work, but it might give a slightly different vibe (in a good way!). Just keep an eye on consistency.
Why did my Red Velvet Crinkle Cookies turn out flat?
Most likely, you skipped the baking powder—don’t do that! It’s essential for those crinkly edges. Also, check your baking soda; if it’s expired, your cookies won’t rise either. Lastly, if your dough was overmixed or too warm when scooping, they might spread too much while baking. Look for set edges and soft centers—that’s when they’re just right!
Can I use liquid food coloring instead of gel for this dish?
You can, but I wouldn’t recommend it! Liquid food coloring can mess with the dough’s consistency and may not give you that vibrant red color you’re after. Gel food coloring is thicker and packs more punch without adding extra liquid (which helps keep your cookies sticky-sweet). If you’re stuck with liquid, just go easy on the amount—you don’t want to throw off the balance!
Final Thoughts on Red Velvet Crinkle Cookies
These Red Velvet Crinkle Cookies are all about that amazing crinkle effect—seriously, it’s what makes them so fun to look at and eat. If you’ve got a craving for something sweet, these beauties come together pretty quickly and deliver a big flavor payoff without too much fuss. So go ahead, whip up a batch! Trust me, once you see those gorgeous cracks dusted in powdered sugar, you’ll want to make them again and again. Let me know how yours turned out in the comments!
Red Velvet Crinkle Cookies
Ingredients
Method
- Preheat your oven to 350°F (175°C) and line a baking sheet with parchment paper.
- In a medium bowl, whisk together the flour, cocoa powder, baking powder, baking soda, and salt. Set aside.
- In a large bowl, mix the granulated sugar and vegetable oil until well combined.
- Add the eggs, vanilla extract, and red food coloring to the sugar mixture, and mix until smooth.
- Gradually add the dry ingredients to the wet ingredients, mixing until just combined. The dough will be sticky.
- Using a cookie scoop or tablespoon, scoop the dough and roll it into balls.
- Roll each ball in powdered sugar until fully coated and place them on the prepared baking sheet, spacing them about 2 inches apart.
- Bake in the preheated oven for 10-12 minutes, or until the edges are set but the centers are still soft.
- Remove from the oven and let cool on the baking sheet for 5 minutes before transferring to a wire rack to cool completely.